
How to Un-Export Transactions in SuiteProjects Pro
SuiteProjects Pro now provides enhanced flexibility for managing exported transactions through the Integration Manager un-export feature. In addition to the existing ability to mark transactions as un-exported, users can now specify the application to which the transaction was exported and choose whether to un-export the parent record, child record, or both. This functionality provides greater control over the re-export process for transactions such as timesheets, expense reports, invoices, and revenue recognition transactions.
Enable the Un-Export Feature
Prerequisites
- The account must have the internal switch Enable the IM un-export feature
- The user must have the appropriate role privileges.
- The user demographic must have The user can un-export [transaction]
- Integration Manager licensing is required.
Steps
- Navigate to the appropriate transaction list view, for example:
Invoices → Invoices → Approved/All. - Select the records you want to mark as un-exported.
- In the Tips section, click the Run an Action icon.
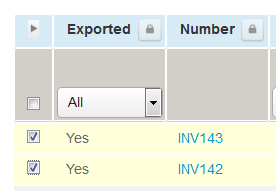
- Select the radio button Un-export the [transaction] marked exported to.
- From the dropdown, select:
- The target application (for example, NetSuite), and
- Which records should be un-exported:
- Parent only — e.g., invoices
- Child only — e.g., charges
Parent and child — e.g., invoices and charges
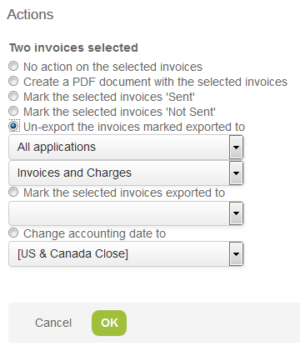
- Click OK.This enhancement allows users to selectively reverse the exported status based on both the integration application and the parent/child transaction level, rather than simply marking transactions as un-exported generically.