
How to Automatically Classify Project Transactions in NetSuite
Finding ways to API, CSV, Workflow, Script or Manually update transactions so that they align with Project-level Classification in Netsuite are a breeze with the Oracle “Project Classification” SuiteApp. This SuiteApp will allow you to segment Projects (adding custom Department, Location, and Class Classifications) and derive Transactional Columns or Headers from those Projects in Netsuite. Setting it up is just a few clicks, and the rest is hands-free.
To install and configure the SuiteApp, follow these instructions:
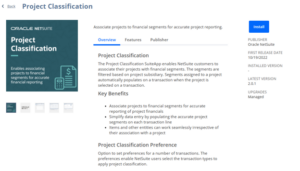
- Navigate to Customization > SuiteCloud Development > SuiteApp Marketplace (Requires Customization Role Privileges) and search for “Project Classification”
- Open the Oracle published SuiteApp and click “Install”
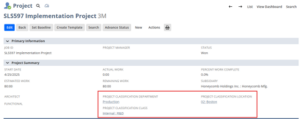
- Upon installation, you will find three (Department, Location, Class) new Classifications available on the Project screen:
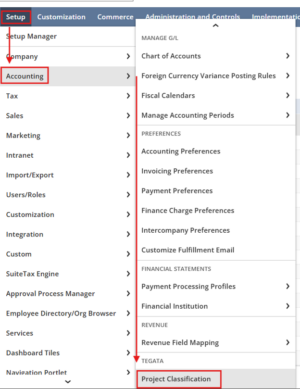
- To apply these values to transactions related to your Projects, you can configure the settings by navigating to Setup > Accounting > Tegata : Project Classifications
- The following screen will allow you to configure whether Classifications are defaulted when selecting a Project (Apply on Select) overridden upon save (Apply After Save) or not at all (both blank)
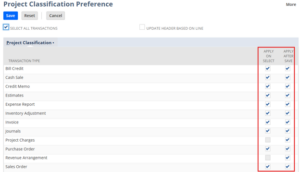
- This feature is compatible with APIs and Workflows, and should be considered if you have existing Integrations, Workflows or Scripts which will derive values differently. For example, take into consideration if a Workflow has different means to set these values by removing “After Save” and allowing the workflow to Execute “After Save” while this SuiteApp sets it only on Select.
This free SuiteApp is a valuable tool for anyone who wishes to apply transactional data without extensive mappings, workflows or scripts to allocate money from Transactions to Classifications driven by the Projects as the key point of reference.