Tips for Advanced Resource Booking Worksheet
- Bookings appear under each resource.
- See resource utilization at-a-glance. Green, yellow, and red color-coded cells highlight underutilized, fully utilized, and over-utilized resources.
- Point to a resource’s name to open a resource QuickView.
- Drill down to greater levels of detail.
- Filter the worksheet by department, job code, project, or skills.
Using the Advanced Resource Booking Worksheet
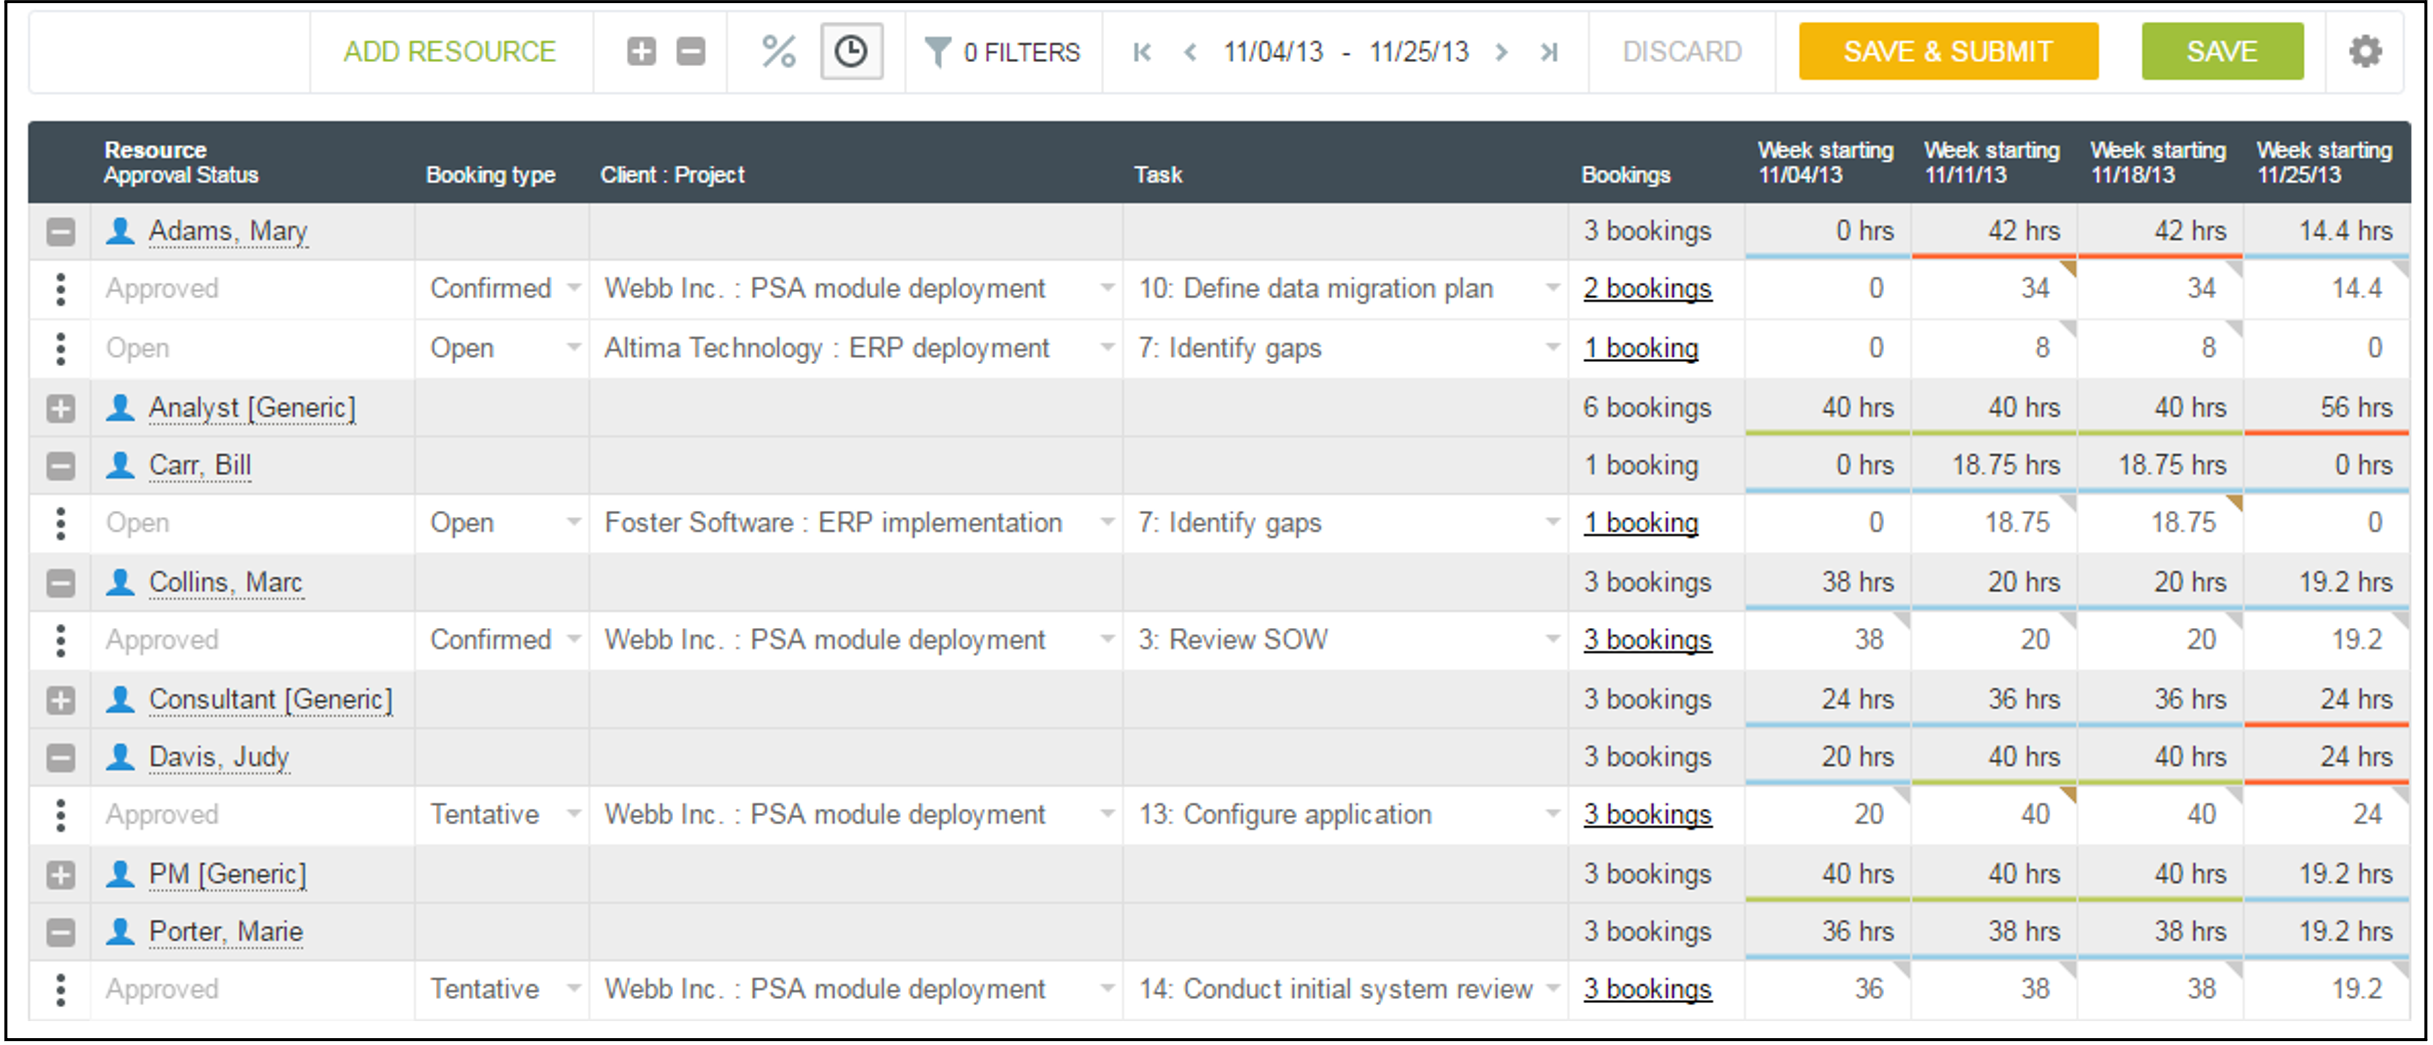
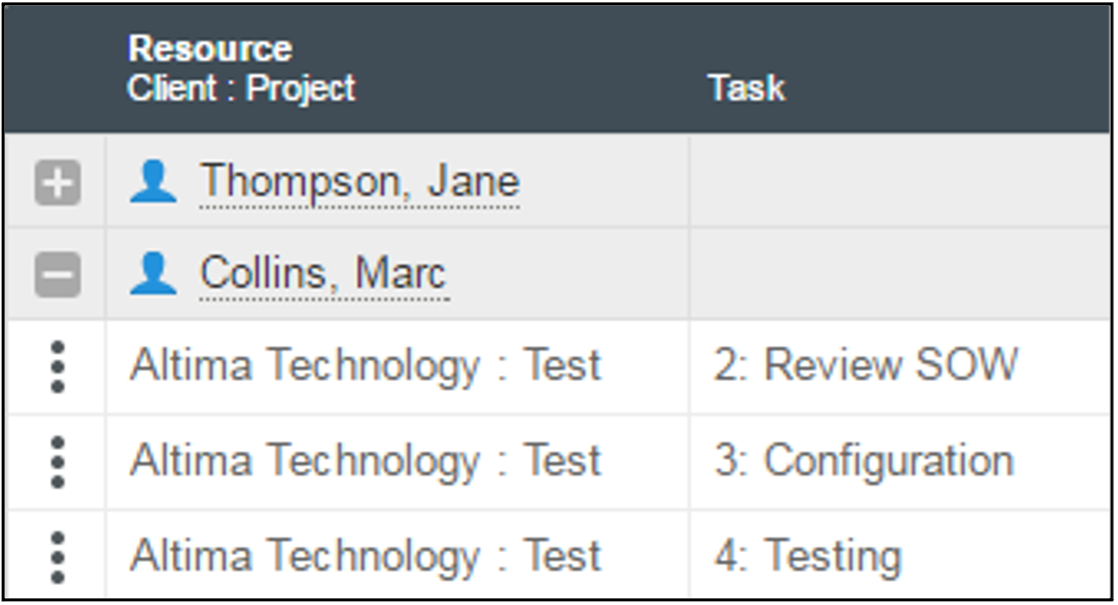
The Resource Booking Worksheet appears as a table with each resource listed in the leftmost column. Point to a resource name to open a QuickView window with various booking-related actions you can perform. You can expand each resource’s worksheet rows by clicking the ![]() icon next to their name or collapse the details by clicking the
icon next to their name or collapse the details by clicking the ![]() icon.
icon.
Date Ranges and Filters
Select a date range to display using the date selector at the top of the worksheet.
![]()
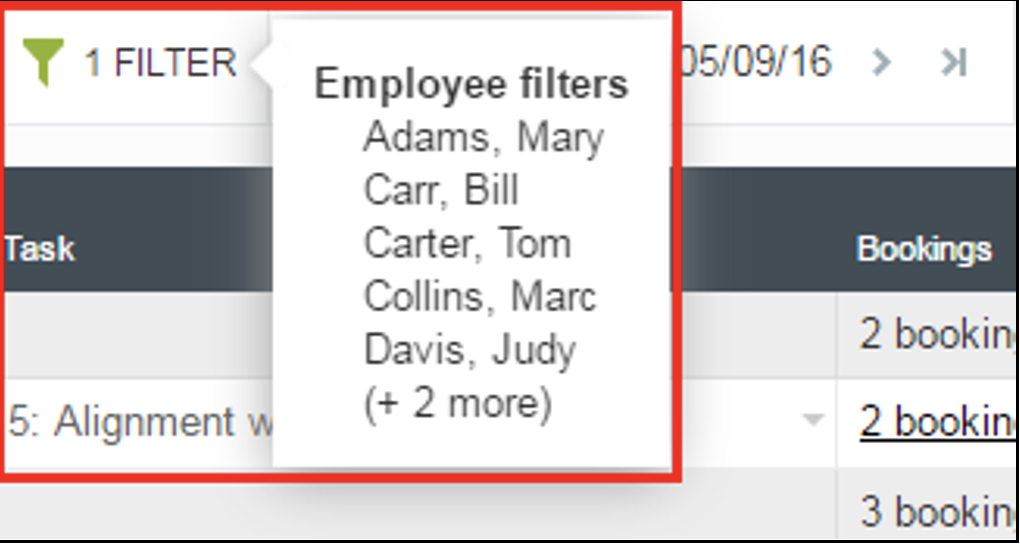
A filter indicator at the top of the worksheet shows how many filters you currently have applied. Click the indicator to open a tooltip with a description of the filters.
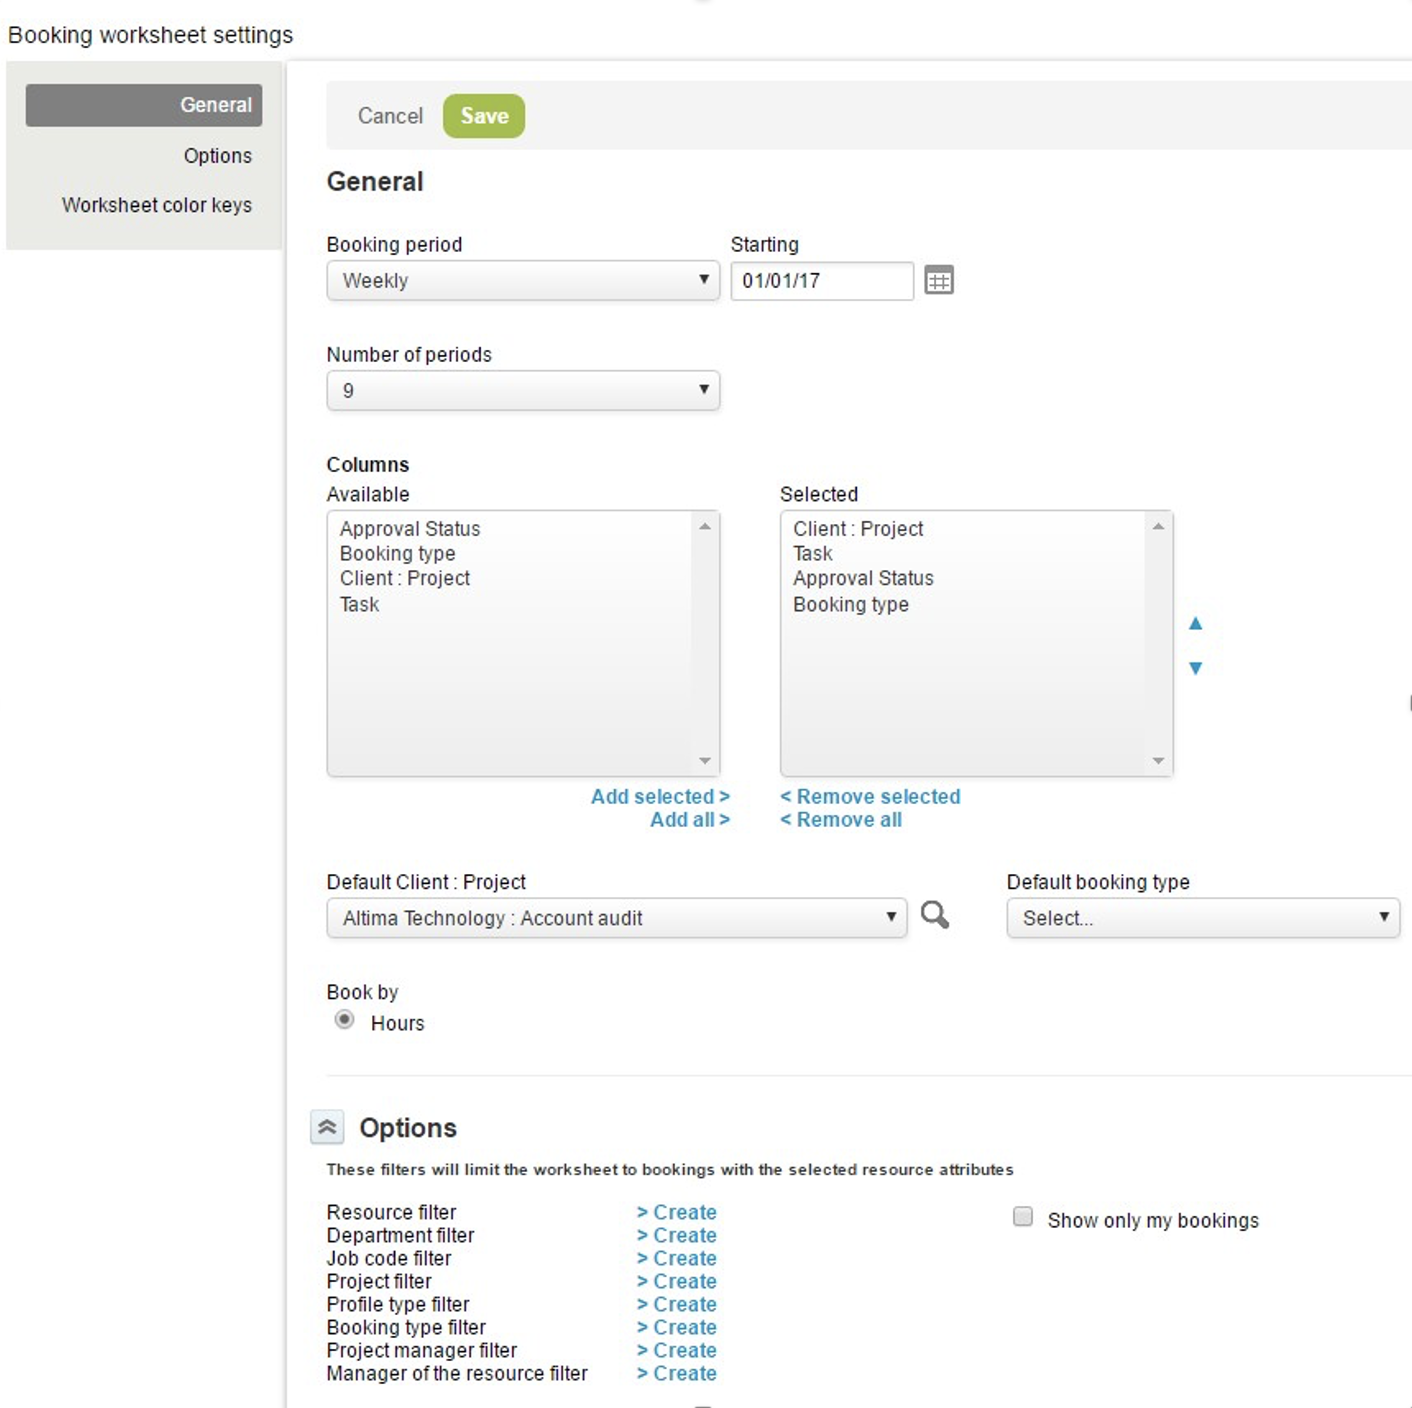
You can edit settings for the Resource Booking Worksheet by clicking the ![]() icon. You can set filters, customize columns, and set a default project and booking type.
icon. You can set filters, customize columns, and set a default project and booking type.